This post is part of the Travel Handmade series, for more great bag post click here!
Today I am going to be reviewing the Professional Tote Bag Pattern by The Creative Thimble and designer Laura Martell (she blogs over here!).

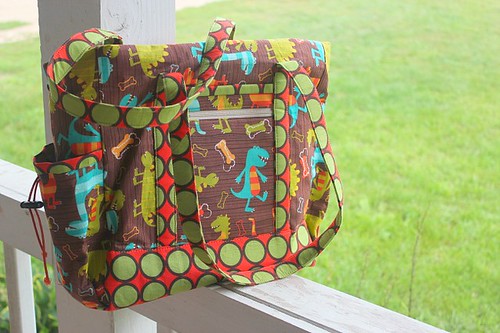
Like I said, the pattern calls for a hefty amount of heavy weight stabilizer which means normal quilting cotton can be used without the bag losing it's professional looking shape-which I love! So keeping things fun, I decided to go with these dinosaur, striped, and polk-a-dot prints by Michael Miller.
In my opinion, the most time consuming part of this entire bag is the prep work you need to do before you even sit down at your sewing machine. There are over 16 pattern pieces (between bag body, interior, and pockets) for both the cotton fabric and the stabilizer--which can be overwhelming! However, the pattern designer does included a labels page for you to cut apart and pin to your pieces as you go in order stay organized as you go--much appreciated!
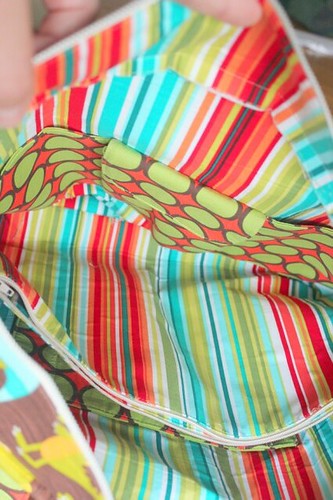
Once I had all the pieces cut out, and then ironed all the stabilizer pieces to it's matching cotton piece, it really was smooth sailing from there. The pattern designer did a great job of writing clear, easy to follow directions with lots of illustrations. While sewing, there are spots where things can get a little rough because of all the layers--but with a new denim needle and my walking foot I was able to stay out of trouble! My favorite part is how professional looking (probably all the topstitching) this bag really is and the fact that all of the seams are enclosed! Brilliant!
If you notice, the side pockets have elastic cording and cord locks on them. Two words: thrift store! Look for things like winter coats and rain jackets--most of them have the cord stops and matching elastic cording. Not to mention the zipper pulls you can find!
I would classify this pattern as intermediate to advanced--because of all the zippers and the button holes. It is a great project to learn new and review your sewing skills because there are so many great elements to the bag. In fact, I don't think I had touched a button hole since my 4-H sewing days!
This bag has already gotten tons of use just because it is so versatile. It can fit anything and has lots of pockets to keep things secure. From day trips to long travels, I know this bag will get lots of use!
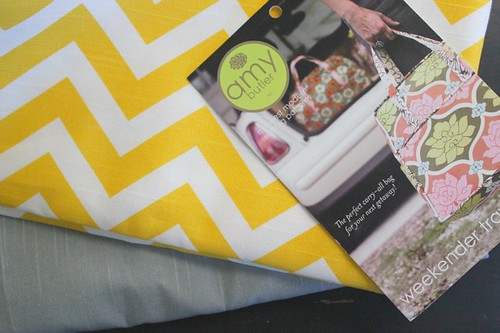
Now that I have this bag under my sewing belt, it is time to tackle the Weekender Bag! :) I will have one for The Sewing Summit!
xo, Megan
Please let me know if you have any questions and I will answer them here.
Please let me know if you have any questions and I will answer them here.

![travel handmade [dino carry on]](http://farm7.static.flickr.com/6188/6052327403_aac57ccde4.jpg)
![travel handmade [dino carry on]](http://farm7.static.flickr.com/6062/6052327601_da048a326a.jpg)
![travel handmade [dino carry on]](http://farm7.static.flickr.com/6081/6052328117_8392dcabe6.jpg)


Beautiful bag! Sounds like it was a lot of prep work but well worth it.
ReplyDeleteGreat review - thanks!
ReplyDeleteWow! That bag sure does look like it could hold anything! I'm right there with you on wanting to do the Weekender for the Sewing Summit - we'll see if I wind up with enough guts for it!
ReplyDeleteLooks like a great bag!! Good luck with your weekender. I'm at the lining stage of it and cursing it all the way -lol! Really, each step isn't so bad, just take it slow and read the directions carefully!
ReplyDeleteThis turned out so amazing! I love it. It does look totally professional ;]
ReplyDeleteThis bag is so fun! Love those toggles.
ReplyDeleteGood luck on the Weekender! That bag scares me a little.
oooh! It looks like you're going to make a twin of the Weekender Ali made me! I love it so! :)
ReplyDeleteIt looks fabulous!
ReplyDeleteLots of fun details on this bag! Looks like there is a place for everything!
ReplyDeleteI love this bag! I think I might have to make one for myself. Thanks for sharing!
ReplyDeleteGreat review! I have made 5 Weekenders so far. From your review this pattern sounds similar. Lots of pieces and lots of interfacing! Feel free to contact me if you have any questions. I also have picked up a few tips from doing it 5 times that I am more than willing to share.. I am sure you can do it! I love my Weekender and it's def. worth the trouble. (Although I don't recommend doing it more than once.)
ReplyDeleteI made this bag twice. The first time I made it according to the pattern, even though I was pretty sure it was going to be too small to make a great work tote. And it was. Be awre that putting puffy pockets on the ends of a tote bag does not magically turn a 15" tote into an 18" tote. The dimensions of the tote, itself are 15" W X 15" H x 5" D. Then there are drawstring pockets that increase the overall dimensions, but it is still a 15" tote.
ReplyDeleteAlso, the zippered pocket in the centre of the lining seriously limits the amount of 'cargo space available.
The second time that I made it, I made the following changes:
I increased to actual tote width to 17".
I made the end pockets exactly the same width as the panel and did not put a drawstring. I never carry a water bottle and the flat is more practical for the type of thing I put into those end pockets.
I pieced the end pockets so that the bottom was of the same contrast material as the bottom of the bag. It looks better and the ends show soiling much less, because I always use a dark bottom.
I re-worked the lining to offset the zippered pocket so that it is 1" from one side of the bag (and, thus 4" from the other side). This provides considerably more cargo room. ANd while the added width of the bag means that I might now actually be able to use the pocket for its intended use as a laptop pocket, I don;t. I slide my pocket into the 1" side of the bag and use the zippered pocket for papers, etc.
I added more pockets to lining - created a credit card pocket for the interior of the zippered pocket and flanked it on either side with a regular pcoket. On the outside of the zipper pocket (next tot he 1" side of the bag, I put 3 pouch pockets.
I made a double zippered/flap pocket for the other side of the lining on the 1" side. I made it 9" wide to hold pencils, etc.
I put the velcros pocket and 2 slide pcokets as per the pattern on the lining of the 4" side of the bag.
I also used a separating zipper on the top of the bag.
It is almost perfect. The only problem I have - and I have it with both bags - is that a wrinkle forms between the top of the bag and spot where the handles anchor to the tote. I used the recommended interfacing, Decor Bond, on both bags. All of my friends who have made this bag have the same problem with it. It does not affect functionality, but it definitely DOES affect the 'professional' appearance of the bag. I am going to try sewing through the bag and the lining together right under the line of the straps. Then I will sew the straps down almost to the very top of the bag. I think this might help. There is no problem with the back of the bag in this regard.