
So you've picked a quilt pattern, pulled the perfect fabrics, mastered the 1/4" seam allowance, completed a quilt top, and layered + basted your project, now what? Today I'm going to share some helpful straight-line quilting tips & techniques so that you can finish any quilt project (large or small) on your home machine.
Straight-line quilting is my favorite. If you've been a reader for any amount of time, you've probably already figured that out. It gives such a fresh & modern feel and can be used in so many different projects and patterns. Straight-line quilting also creates a great texture, especially when washed --- yummy! Plus there's something so enjoyable + soothing about stitching straight-lines, it's so therapeutic!
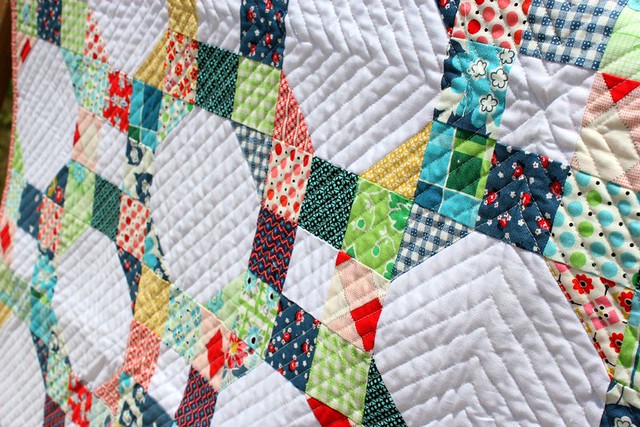 |
| DS Picnic + Fairgrounds Quilt |
Making sure your quilt or project is properly basted is one of the key elements to a successful & enjoyable quilting experience, not just straight-line quilting! I prefer to spray baste all of my quilts using 505 Spray for two reasons: [1] it's faster than pin basting, which equals more quilting & sewing time! and [2] i've found that it eliminates shifting when quilting. I recommend using a spray baste product on a hard + washable surface (ie. the kitchen floor) because it does result in a little leftover residue, nothing a little warm water & soap can't handle! Also make sure you are in a well ventilated area -- open a window!
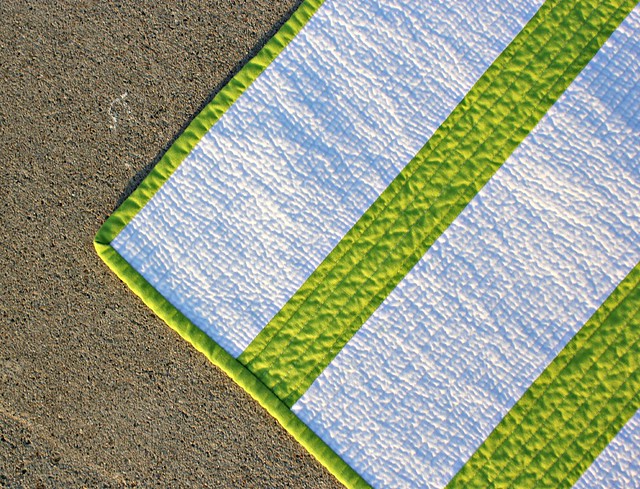 |
| Firefly Quilt & Tutorial |
two // new needle
I like to start every new sewing & quilting project with a new needle and recommend you do too! I use a Schmetz Universal Needle size 80/12 for all of my piecing and quilting. Find a needle that works for you & your machine and then stick with it.
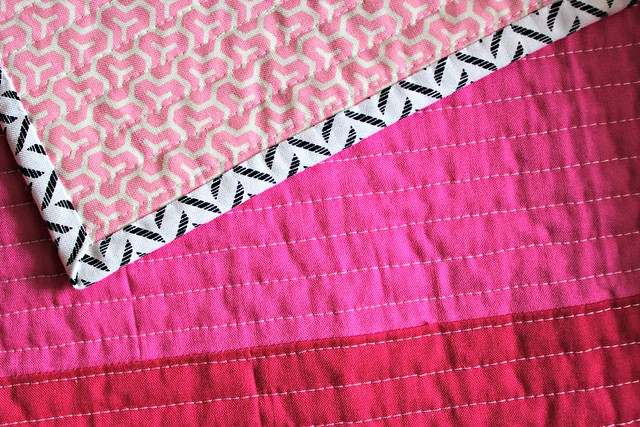 |
| XO Quilt & Tutorial |
three // walking foot
A walking foot is a must have -- I wouldn't straight-line quilt without one! A walking foot has feed dogs that, along with machine's lower feed dogs, help evenly pull the quilt through the sewing machine. Check with your specific machine dealer & manual for more information on a walking foot.
 |
| Granny Square Quilt |
four // “needle-down” position
If your sewing machine has a "needle-down" position, use it! This setting makes sure the needle stops in the "needle-down" position every time you take your foot off the pedal. It really helps keep a straight-line every time you need to start & stop quilting -- ie. re-adjusting & thread change.
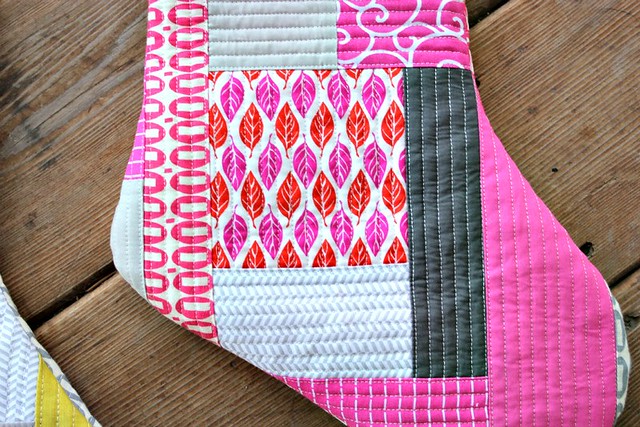 |
| His + Her Christmas Stockings |
five // thread
Thread selection can really effect your straight-line quilting results. I like to use 50 wt. Aurifil thread in all of my sewing & quilting projects. It's a fine, cotton thread that quilts up wonderfully -- I really like how it blends into the fabric. Keep in mind each sewing machine is different, so the thread that works on my machine may not work as well on yours. Play around with a few different types + brands until you find a thread you like!
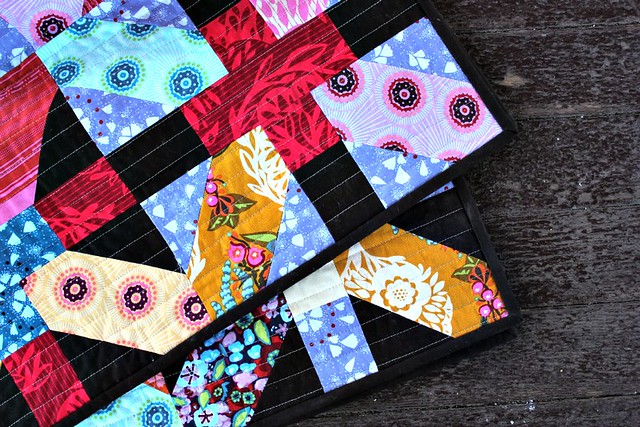 |
| x and + Quilt |
six // slow & steady
This step is key -- slow & steady wins the race. I've found that a slow and steady pace helps to keep the quilting lines straight and even. Remember to enjoy the process of quilting, each and every step!
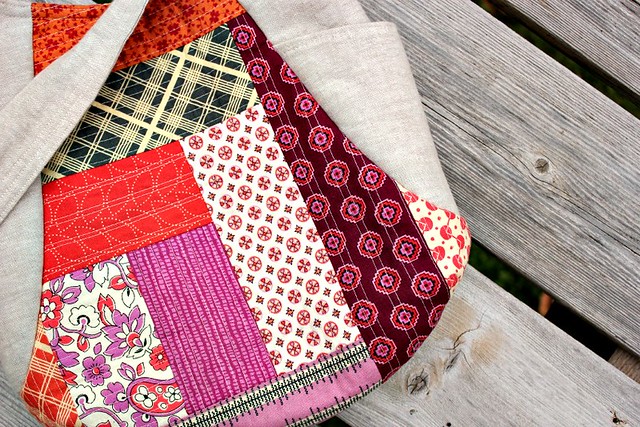 |
| 241 Tote |
If you aren't comfortable quilting straight-lines without a guide, don't worry! Products like FriXion pens or even painters tape can help make marking your project fast and easy. Once you get going, try using the edge of your walking foot as a guide.
I hope that you find these straight-line quilting tips & techniques helpful. Remember that it's not about achieving "perfect" straight lines -- there's no such thing! It's all about enjoying the process, trying new things, and feeling confident & enjoying your talent.
xo, Megan

Thanks! Your lines and quilting are always so nice and perfect! Just learning and appreciate all you great bloggers!
ReplyDeleteExcellent advice - thank you. Your straight-line is so lovely!
ReplyDeleteI'm going to add two things!
ReplyDelete1. Increase your stitch length a bit. I piece at at 2 and straight line quilt at a 3-3.5
2. If you have the ability to back off the pressure on your presser foot it will be easier on the fabric
Agree!
DeleteGreat additions, Jen!
DeleteThanks for the extra info on the stitch length. I've always looked at what others do and could never find it. This helps with the learning process. Great tutorial!
DeleteAll great tips. But I'm here to say that I can't ever get over that 241. It is my favorite ever.
ReplyDeletegreat tips! you sound so official! well, I guess you are! :) great tips too from Jen. :)
ReplyDeleteYou are so the big sister I never had! :)
DeleteHaving just spiral quilted, for what feels like days, I am back on the straight lines next time x
ReplyDeleteThank you! I have an ever-increasing backlog of unquilted tops due to my going to learn FMQ "some day". Your quilts look great with straight lines so I'll try to tackle and finish some of mine. Thank you!
ReplyDeleteThat's another reason I love straight-line quilting -- in my book, it's WAY LESS intimidating than FMQing.
DeleteI am a straight line quilting fan too as I really love the texture it creates!
ReplyDeleteThanks for these tips. Have you a favourite width for your straight quilting? eg width of presser foot, half inch etc. also do you start from alternate ends? Sew many questions, sorry about that pun.
ReplyDeleteIt depends on the project, but usually 1/2" (the edge of my walking foot) or 1".
DeleteI just finished my first "straight line quilted" quilt an hour ago! I have been quilting for 14 years and I can free motion quilt no problem, but making even, straight stitches is going to take some practice. I love how it turned out and the modern look it gives to the quilt. Thank you for your tips - I will use them next time!
ReplyDeleteJulie @ The Crafty Quilter
If at all possible, reverse direction on each row. It helps reduce distortion.
ReplyDeleteThanks for the numerous advices in the article and in the comments.
DeleteMegan do you quilt with a FM foot or with a normal one ?
Still didn't get the hang of free motion quilting... doesn't seem to work well when the "sandwich" is not big enough.
Nice tips, I love each of your projects!
ReplyDeleteExcellent! I especially like "slow and steady wins the race." Your voice is empowering for something that spreally seems overwhelming. I think I'll reconsider since I really do love the lines. :) *kd.
ReplyDeleteThank you Thank you Thank you!! I LOVE straight line quilting, but really haven't done much. I appreciate all your information!! And your quilts look amazing! :)
ReplyDeleteHave you had any issues the FriXion pens coming out of the fabric? I haven't heard good things, so I haven't dared try them on a quilt top.
ReplyDeletesome marking pens dont work well with starch, found out the hard way too..
DeleteI recently bought a walking foot for my 1978 Bernina 830 and it is the best investment I ever made for my sewing. Made my straight-line quilting a breeze. Thanks for this informative tutorial.
ReplyDeleteI'm a beginner quilter and I really enjoyed these tips. I, too, love the look and puffiness of the straight line quilting. I'm going to research a walking foot for my 1974 sewing machine! Thanks so much ... this was truly helpful!
ReplyDeleteGreat tips Megan. Thank you. Now to just find more time to quilt...then I would be in good shape.
ReplyDeleteI love the look but have a hard time selecting the thread color. Any tips?
ReplyDeleteGreat tips one and all. Your quilts are so beautiful.
ReplyDeleteHappier Than A Bird Quilts - I've been using th Frixion pens since they've come out and I haven't had an ounce of problems. I've tried lot's of different marking tools and I totally love the Frixon. I'm sure my sewing partner would attest to that as well.
When you are straight line quilting do you start at one end or in the middle?
ReplyDeleteI would like to know this too
DeleteCan you tell us what kind of batting you used in the star quilt up at the top of this post? It's got a nice puff :)
ReplyDeleteGreat, informative post! I'm just starting a new quilt and looked at it today and thought, how on earth am I going to quilt this? It doesn't lend itself to my old fallback of quilting either side of the seam. But rows of strightline stitching might be just perfect!
Beautiful work Megan.
ReplyDeleteI notice that in your quilt with the white snowballs, your quilting turns corners.
I'm quilting a zig zag quilt at the moment with loads of quilting turns and wondered if you have any tricks. I'm hating the whole business of having to keep turning the quilt in my sewing machine throat. Driving me nuts!!!
Thanks.
Andi :-)
thanks for the tips, perfect timing for me, my Janome also has a metal guide you can screw in the plate to keep it the perfect width.
ReplyDeleteI'm about to do a star quilt and was thinking of straight line quilting. Maybe off of one main star... Anyway, thanks for the tips!
ReplyDeleteGreat list of tutorials. Our readers at FaveQuilts would love to see these.
ReplyDeleteKathryn
Thank you soooo much! Megan.
ReplyDeletegreat tips, megan! and totally gorgeous photographs. you're rocking so hard and i freaking love it. :D
ReplyDelete30+ years of quilting and collecting means I almost never go shopping in quilt stores (I can't -- no room!), so this is the first time I've heard of spray basting. OMG! My life is about to change in a BIG way! Thank you!! All the quilting tips are great and I totally second your advice to start with a new needle. But spray basting? Be still my heart.
ReplyDeleteThanks for te great tips! I love the straight line look as well!
ReplyDeleteI love all your tips and examples - beautiful. For the quilting on your x-mas sock - did you stop and start at each line of each section, or did you run the stitch across to the next line? Also, is it okay to switch direction of the quilt while quilting, or do you recommend going one way across?
ReplyDeleteThank you again!
Also, have you ever done a straight line on the diagonal all the way across the quilt? If so, does it shift as if on the bias?
DeleteThank you for the great tutorial with beautiful examples.
ReplyDeleteHi Megan, thank you for the great tutorial! I enjoyed it a lot and found that I am doing pretty much all of the same techniques with the exception of the spray fixative - I worry about that. Does it ever clog your machine in any way?
ReplyDeleteThanks again!
Awesome suggestions for a newbie (and probably a seasoned quilter too)! Thanks
ReplyDeleteYour quilting is beautiful! Really enjoyed your tips as well. Can you tell me how you start and end a row of stitching? Also, do you shorten or lengthen your stitches...they look so perfect in the pictures!
ReplyDeleteI just found your tutorial - it's great! What kind of batting did you use?
ReplyDeleteI just found this post and like it so much. I am mainly a hand quilter and do not like free motion - when I decided to start doing a few quilts here and there with straight lines everyone was telling me I needed to free motion instead - I tried it and didn't like it - so glad to see others sticking with straight lines. Thanks for all your hints.
ReplyDeleteI really like all your advice. I love to straightline quilt but it is the stopping and starting that gets my lines to look giggly! I am working on it though.
ReplyDeleteDo you always start at the same end and quilt each line going the same direction?
ReplyDeleteJust finished quilting a quilt that I pin basted. Wanted to try the stacked circle look. Got a few tucks. Hate that. Have never tried spray basting. Too expensive. But I would love to try it.
ReplyDeleteWhat's the widest you feel comfortable in straight line quilting? Is 2.5" too wide?
ReplyDelete